
Where do I buy appropriate telecommunications equipment and receive advice?
The Regional Tech Hub can produce a free, independent connectivity report outlining all of your options for a broadband and / or voice connection. To get a report done fill in this form here . Thoroughly investigate your connectivity options before deciding on the best provider, installer, or equipment supplier. Unfortunately the telecommunications industry can have sales biases so it is key to ensure you are receiving factual and independent advice.
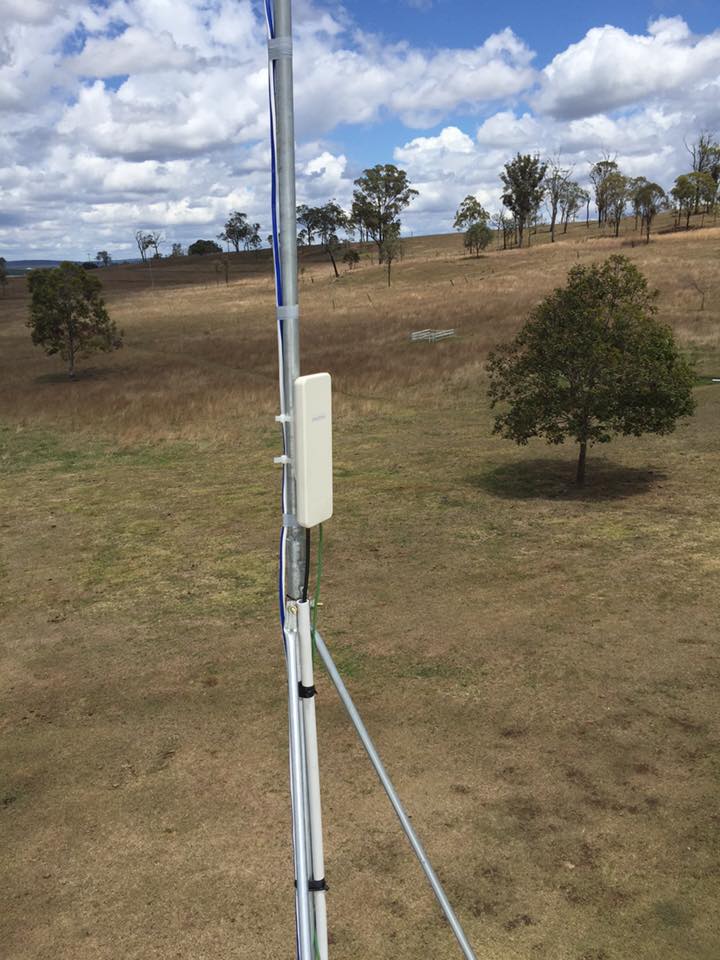
If you are looking for equipment for mobile coverage, a desktop site survey can assist you with determining if there is mobile coverage in your area and with which carrier/s, what frequencies are used and what equipment might be needed to get connected. The businesses below can assist in providing advice.
- Telco Antennas desktop site survey cost is $132.
- OnWireless desktop site survey cost is $99.
The above businesses can then put you in touch with a specialist in your area who understands the requirements for your site. The report will advise likely signal levels, the sort of mobile services available, the best antenna and extension device for your location and where to point your antenna.
Network Extension Equipment Suppliers and Specialists:
- Telco Antennas – Advice, equipment and installation of Starlink, mobile and wi-fi extension products
- OnWireless – Advice, equipment and installation of mobile and wi-fi extension products
- Telstra – Network Coverage Extension Devices
- Powertec Technologies – Equipment provider
- Connected Farms – Advice, equipment and installation of mobile and wi-fi extension products
- Regional Tech Hub – have a list of installers and equipment suppliers*
Installers
- OnWireless Installers
- Telco Antennas Installers
- Installers Near Me – Starlink Installers
- Telstra can provide a professional antenna installation. The costs vary depending on the location (see here for an idea of costs), so it is best to complete the form and discuss a quote that includes installation costs first.
- East Coast Electronics Installers
What should I look for in a good installer?
- Ensuring the installer you choose is accredited and has the appropriate industry licenses for the service they provide.
- Check that they are registered business, with an ABN and have insurance.
- A registered cabler can install or repair all communications cabling in your home or office. They cannot install or repair cabling owned by a carrier or NBN.
- Make sure the cabler you choose is registered. You can check here
Using a registered cabler gives you peace of mind. They understand the Australian standards that keep customers, cablers and the network safe.
More information on the ACMA website
How do I ensure all equipment is licensed and not illegal?
- Active antennas or repeaters can boost a mobile signal. Repeaters such as these that require power to the unit (Telstra Smart Antennas & Nextivity Cel-Fi Repeaters) require licensing. If they are not licensed they are ILLEGAL boosters.
- Illegal boosters/repeaters carry a large fine as they can interfere with the mobile network.
- Penalties for breaching the rules are serious. Offenders could get fines of over $1.5 million or up to 8 years in prison.
- Report illegal equipment
If you are aware of anyone having or using illegal equipment, or you see someone selling it online, please report it to ACMA. Using this illegal equipment can have life-threatening consequences. You can:
- call the ACMA’s customer service centre on 1300 850 115
- email ACMA at info@acma.gov.au
BIRRR does not recommend self installation, please contact one of the professionals above.
NB: *If you are a network extension specialist or installer and would like to be added to the Regional Tech Hub map of suppliers and installers, please fill in this form .
Note: BIRRR has gathered the information above from businesses, which we understand to be true and correct at time of publishing. This does not equate to any form of endorsement. Please thoroughly investigate your options before deciding on the best provider, equipment supplier and ensure the installer is accredited and has the appropriate industry licenses.