How to use iDevice Screen Time

With the Apple Screen Time feature, you can access real-time reports about how much time you spend on your iDevice and set limits for what you want to manage. With Content & Privacy Restrictions in Screen Time, you can block or limit specific apps and features on yours and your child’s device, as well as restricting the settings on iPhone, iPad, or iPod touch for explicit content, purchases and downloads, and privacy. iDevices need to have iOS 12 installed.

Turning On Screen Time

               How to turn on screen time

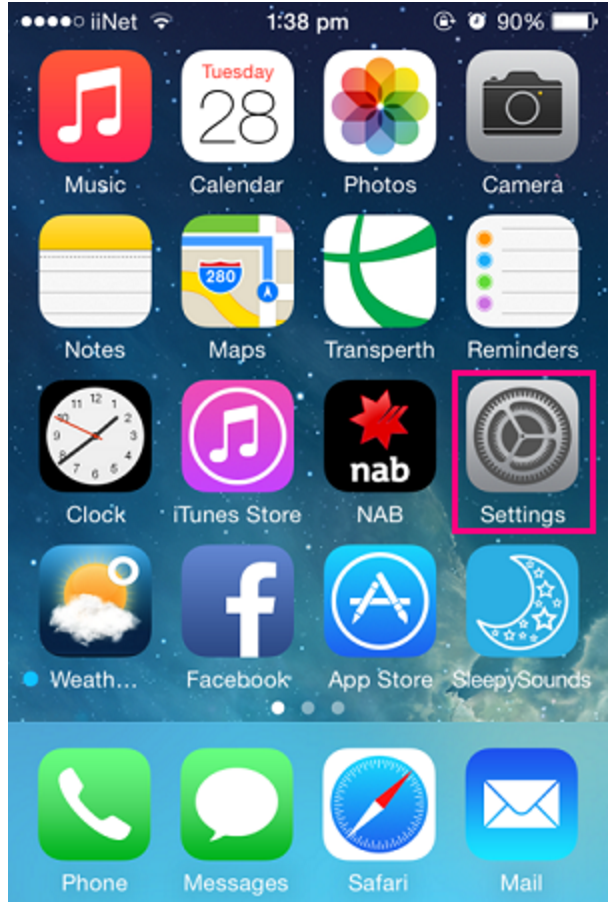
On your device, go to Settings > Screen Time.

Tap Turn On Screen Time.

Tap Continue.

Select This is My [device] or This is My Child’s [device].

How to use screen time features

Once Screen Time is turned on, on each device you can get a report about how you use your device, apps, and websites, any time you want.

If it’s your child’s device, you can set up Screen Time and create settings on their device or you can use Family Sharing to configure your child’s device from your own device. After you set up your child’s device, you can also use Family Sharing to view reports and adjust settings any time, right from your own device.

With Screen Time you can also create a dedicated passcode to secure settings, so only you can extend time or make changes. Make sure to choose a passcode that’s different from the passcode you use to unlock your device. To change or turn off the passcode on your child’s device, tap Settings > Screen Time > [your child’s name]. Then tap Change Screen Time Passcode or Turn Off Screen Time Passcode, and authenticate the change with Face ID, Touch ID, or your device passcode.

49769259_10157842412412316_2298006489194823680_n

54256987_1667612606718513_37104982679355392_n


View your report and set limits

Screen Time gives you a detailed report about how your device is used, apps you’ve opened, and websites you’ve visited, any time that you want to see it. Just go to Settings > Screen Time, select the device and tap the blue line under the time to show the graph.  You can see daily or weekly stats on screen time usage.  You can also set limits for your most used apps, and see how many times a device was picked up or received a notification. If you turned on Share Across Devices, you can view overall usage across devices that are signed in with your Apple ID and password. The report feature also allows you to see when the phone is being used, how long is being spent on each app/site and how many pick ups and notifications the device gets.

53932197_655968281472976_8828656828591112192_n


Downtime

When you schedule Downtime in Settings, only phone calls and apps that you choose to allow are available. Downtime applies to all of your Screen Time-enabled devices, and you get a reminder five minutes before it starts. You can set a specific downtime for each device and also select certain apps that are excluded from the downtime (such as messages, calls, maps etc).  Phone, Messages, FaceTime, and Maps are Always Allowed by default, but you can remove them if you want.

49728033_10157842412512316_8915766208532316160_n49274290_10157842412677316_1682103372880019456_n


App Limits
You can set daily limits for app categories with App Limits. For example, you might want to set a limit on social media during exam block or while you are at work. Limits refresh every day at midnight, and you can delete them any time. Your child can also request ‘extra time’ if they go above the set limit on an app. Select the device you want to add a limit too and click on Add Limit, select the app and a time you want the device limited to.

54362923_594323507740226_4477930806865559552_n49348605_10157842412612316_6377799269444747264_n


Content & Privacy Restrictions
You decide the type of content that appears on your device. Block inappropriate content, purchases, and downloads, and set your privacy settings with Content & Privacy Restrictions. You can block explicit movies & music, multiplayer games and certain web content, if you scroll down you can even block specific websites.

49461726_10157842412722316_2895484294594035712_n55575990_2241816189414594_4839275467859034112_n


Do Not Disturb

54214903_413746005863792_5659492145539579904_n

Just above Screen Time in settings is a feature called Do Not Disturb.  This has a fabulous feature that limits notifications while you are driving. You can set this up to text contacts with a message saying you are driving and will call when you reach your destination.

Use Screen Time with your family

With Family Sharing, you can share music, movies, apps, and more with family — and it also works with Screen Time. You can view reports and adjust settings for children in your family any time, right from your device. If you’re already in a family group, go to Settings > Screen Time, and tap your child’s name. If you need to create an Apple ID for your child, go to Settings > [your name] > Family Sharing > Screen Time.

Or if you’re new to Family Sharing, tap Set up Screen Time for Family and follow the instructions to add a child and set up your family. You can add family members any time from Family Sharing settings. To use Screen Time with Family Sharing, you need to be the family organizer or parent/guardian in your family group, on iOS 12. Your child must be under age 18, in your family group with their own Apple ID, and on iOS 12.

Disclaimer: BIRRR are not specialists in this area, this is just one tool you can use to manage yours and your child’s device.  BIRRR encourages you to read widely on this topic if you have primary or secondary age children and reminds parents that many social media platforms require children to be at least 13 years of age. 

Thanks to Apple Support for instructions on Screen Time Features

Excessive uploads gobbling your data allowance?

If your uploads are higher than your downloads, some things to check are

  • You need to isolate what device is uploading all the data. Turn off all devices and only turn one on for 2 hours and monitor your data usage. Keep doing that until you find the culprit.
  • Login into your account with your service provider and see if you can pinpoint when the uploads are happening. Your RSP will only have hourly data keep for the last 24 hours.
  • Do you have a Network Attached Storage device? If so, turn it off and see what happens. The software on them can phone home for updates.
  • Your router may have been ‘hacked’. Try bypassing the router and plugging your computer directly into the NTD and see what happens.
  • Your computer maybe ‘talking to friends’ in the background. Here is how you can turn that option off.

Windows 10: Check here to see how to set you WiFI connection to WiFi, disable peer-to-peer updating, prevent automatic App updates and Live Tile updates, Save data on web browsing. http://www.howtogeek.com/249254/how-to-stop-windows-10-from-using-so-much-data/ This tells you how you can moniter your data usage in Windows 10
https://www.cnet.com/au/how-to/monitor-your-data-usage-in-windows-10/

Apple: Most often BitTorrent, iCloud, Dropbox, or some other cloud-data application is involved in cases of mysterious bandwidth use by a Mac. If you use iCloud, uncheck at least iCloud Drive in its preference pane and see whether there’s any change. If you use third-party network backup or file-sync software, disable that. If you use a torrent client, remove it. https://discussions.apple.com/thread/7314385?start=0&tstart=0

If you have tried all the above suggestions, and still can’t control the uploading of data you will need to contact your service provider and ask for help. They will be able to monitor in real time what is happening over your connection (best done when the uploading is actually happening)

Reducing Data Usage on iDevices

One of the most-often asked questions on the BIRRR facebook page is ‘How can I save data? It seems to be vanishing without me doing anything!” While sending photos and uploading big documents are often unavoidable as we conduct business via the internet and can eat into our data limits, there is actually quite a lot we can do to curtail some of the often-unseen big data users chewing through our very limited monthly gigabytes.

Many of the things you can do to manage data usage are

  • Save data in iOS
  • Track how much data you use
  • Stop Apps from using your data
  • How to see which Apps are using data
  • To save cellular data and use WiFi, turn off cellular data
  • Turn off autoplay in Facebook
  • Manage how you use Facetime
  • Manage how you use iCloud
  • Manage how you use iTunes
  • Manage data roaming
  • Use Safaris reading list to read articles offline
  • Manage the data guzzler Photo Stream
  • Turn off push notifications
  • Manage how you get emails
  • Stop Background App refresh
  • Manage WiFi
  • Use WiFi Hotspots

Solutions to the above data usage savers can be found here

Whether you use mobile or satellite broadband, if you own iDevices this is a short checklist to follow (as well as doing what is mentioned above)

 I-DEVICES

Operating system updates for Apple iOS are AUTOMATIC if you are connected via WiFi or cable. If the device is Cellular only, it is NOT automatic, and can be scheduled.

Disable a feature called Wi-Fi Assist which is enabled in the default settings of iOS 9.  Our iDevices can chew through ENORMOUS amounts, through updates and syncing. Go through the following checks to ensure your iDevice is NOT automatically chewing through precious data. The first step is to find the SETTINGS on your device.

Screen Shot 2016-02-12 at 7.17.00 AM

CONTROL UPDATES

TURN OFF i-CLOUD UPDATES

The constant syncing of i-cloud on iDevices, especially if you have several devices, can really chew through your data. You can always turn them back on if needed, but make sure you aren’t in ‘automatic update’ mode:

  • Go into Settings>iCloud
  • Uncheck ‘icloud drive

This is a good spot to uncheck any other ‘auto-updates’ you might not need synced.

icloud

APP UPDATES AND WI-FI ASSIST

Check that apps that aren’t needed all the time are not updating and turn off wi-fi assist. Wi-Fi assist automatically defaults to using your mobile data when Wi-Fi signal is poor. This means your mobile data could be used without you realising, causing your mobile service to exceed your monthly quota and accrue excess data fees.

  • Go into Settings>Mobile
  • Go though your apps and  UNCHECK those you don’t need constantly accessing data.
  • UNCHECK the Wi-Fi assist option at the bottom

NB: Wi-Fi assist is a feature that is enabled by default in iOS 9. If your i-Device is running an earlier version of iOS, your device will not have this feature.

  • wifiassist

APPS REFRESH

  • Go into Settings>General>background app refresh
  • turn off (this will also save battery life)
  • BAR

AUTOMATIC UPDATES

WARNING: Your i-Device will automatically download iOS updates (when a new one is available) while it is charging, connected to the internet (thru WiFi) and there’s sufficient free space on the device. It will then prompt you to install, turning off updates will NOT prevent the auto download of iOS updates. Turning your device to airplane mode whilst charging OR having your device ONLY on cellular may prevent this.  

  • Go into Settings>App and iTunes Store>Update
  • Scroll down this page until you see the AUTOMATIC DOWNLOADS heading. All new content that you buy after you turn on Automatic Downloads automatically downloads to all of your devices. When you turn on Automatic Downloads, your device associates with your Apple ID.If you use Family Sharing and turn on Automatic Downloads, content bought by other members of your family won’t automatically download to your devices. Only content that you purchase with your Apple ID downloads automatically.Here, you’ll see four options. Turn off Updates and other automatic downloads such as Music, Apps and Books.

Music – When turned on, any purchased iTunes music will download automatically.

Apps – When turned on, any purchased apps will download automatically.

Books – When turned on, any purchased Books will download automatically.

Updates – When turned on, updates for any apps on your device will download as soon as they become available.

  • turn off Use Mobile Data for automatic downloads

See expert tip at the bottom of this article to adjust settings in your router (at OWN risk), this is the only way to prevent automatic iOS updates.

Turn off Automatic Downloads in App & Itunes

PUSH NOTIFICATIONS

  • Go into Settings>Notifications
  • If your iDevice has an Internet connection and you turn on Push Notifications, your content automatically downloads to your device. On devices that don’t support Push Notifications, your content automatically appears in your iTunes download queue. You can manually download the content in iTunes.
  • Turn off any apps that you don’t require push notifications for.

12669776_10154770136082316_598626597_o

All of the above tips will often need to be re-applied after completing an update.

An easy and easy to forget tip is also to shut down all your apps and browser windows when you have finished with them.

  • Double click HOME button
  • Swipe apps (and browser windows) closed.

This is a small selection of the many data-saving tips you can employ – find more here Data Saving Tips

Expert Tip: Your iDevices will automatically download iOS (when new one is available) while it is charging, connected to the internet (thru WiFi) and there’s sufficient free space on the device. To disable automatic download, you will have to put a block on your wireless router to prevent your Apple iOS devices from contacting Apple update servers. Add mesu.apple.com to your router in access control.

Tips if you have multiple iDevices: You can use a computer with iTunes to download IOS Updates once, and then manually install the update onto multiple devices. Instructions for doing this are available by clicking here.

Another option, if you have a Mac computer, you can install the macOS Server app from the mac App Store, which costs $19.99. This has a feature called “Caching” which, when turned on, will intercept any downloads from the mac and iDevice app stores, and keep a copy. Next time a device requests the same file, it will download it from the mac instead of from the internet, saving your data. There is no need to tell your iDevices to fetch the updates from your mac, it just happens automatically  This works with every device on your network. I have used this in a school with lots of iPads, and it was saving 100+GB per week at one point. Some more info is available here.

* Please note, while all care has been taken in compiling BIRRR documents, we recommend that you check with your service provider regarding your own connection issues and best plans available.  Information compiled for BIRRR by Julie Stott, Amanda Salisbury, Kye Rosendale, John Kitchener & Kristy Sparrow.  BIRRR updates articles as time permits and when new information is available.

Cloud Computing : Dropbox , iCloud, OneDrive, Google Drive

Cloud computing has gone from a ‘buzz word’ a few years ago, to an integrated part of both Apple and Microsoft operating systems. We have Dropbox, Onedrive (Microsoft), iCloud (Apple), Google Drive etc.

THE GOOD

  1. You have a backup.
  2. You can also access to your files from anywhere that has an internet connection, across multiple devices.
  3. You can even share files with others.

An example of using DropBox:

‘I went to a party and took a lot of photos and a few movies with my mobile phone. As soon as I returned home, my phone connected to the WiFi and uploaded the files to the ‘cloud’.  These files were then accessible from my PC, my Laptop and my Tablet which not only meant that they were backed up they also could be viewed on the larger PC screen.’

THE NOT-SO-GOOD
Multiple movements of files: Internet use is calculated by both uploads and downloads. In the above example the picture and movie files were counted as data when they were transferred UP to the cloud, and then were counted AGAIN to DOWNLOAD to my PC. Then they were counted yet AGAIN to download to my laptop. By itself, it may not be a big thing, but it does add up.

What to do?

  1. Try to identify if you are running any cloud applications
  2. be aware that newer operating systems (by default) may automatically use cloud apps eg: iCloud and Onedrive.
  3. Consider turning them off completely – I have stopped using Dropbox and removed the apps from my mobile devices. Not only that the new install of windows 10 can automatically connect to Onedrive – event though no files were yet shared to it yet. And the new version of Microsoft word wants to save to Onedrive by default.
  4. Choose (instead) to save to the local computer.

(Thanks to Cliff Tindall From Christmas Island Computer Services for the above information.)

DROPBOX

How to PAUSE and RESUME syncing from Dropbox

Dropbox allows you to pause and resume syncing through the Dropbox menu in your system tray or menu bar on your computer.

When syncing is active, Dropbox will try to be smart about the amount of bandwidth it uses. Dropbox will use any remaining bandwidth available to download changes and only 75% of available bandwidth to upload changes. You can also adjust your bandwidth usage through the Dropbox desktop application’s preferences.

If you’d like to stop Dropbox entirely, you can do so through an option in your Dropbox menu.

Screen Shot 2015-11-08 at 7.36.51 AM Screen Shot 2015-11-08 at 7.36.41 AM

(The above information is taken from Dropbox)

How to DISABLE AUTOMATIC PHOTO UPLOADS in Dropbox on iPhone / iPad:

Step 1: Open Dropbox

Step 2: Tap the Settings gear icon (bottom right)

Disable-Automatic-Photo-Upload-in-Dropbox-iPhone

Step 3: Now, tap on the “Camera Upload” option

Step 4: Turn the switch to OFF

Turn-Off-Automatic-Photo-Upload-in-Dropbox-on-iPhone

That’s it. Dropbox will now stop automatic syncing of photos from your camera album.

Thanks to iGeeks Blog for the screenshots and tips.

iCLOUD:

Turn iCloud features on or off:

Depending on which device’s settings you want to change, do one or more of the following:

On your iOS DEVICE: 

Go to Settings iCloud, then tap to turn on or off iCloud features.

idevice cloud off

On your MAC

Choose Apple menu > System Preferences, click iCloud, then select or deselect each feature.

idevice cloud drive off.jpg

NB Some features aren’t available or are listed differently in earlier OS X versions.

On your WINDOWS computer: 

Open iCloud for Windows, then select or deselect each feature.

To make your changes take effect, click Apply.

S0012_WiniCloudPrefs

  • Some features aren’t available on your Windows computer, or are listed differently, depending on whether your computer has Microsoft Outlook 2007 or later installed.

    Outlook installed: You use iCloud Mail, Contacts, Calendars, and Tasks in Outlook. Note that iCloud reminders are called tasks in Outlook. If you turn off Mail, Contacts, Calendars, and Tasks, the iCloud information remains available in Microsoft Outlook, but it isn’t kept in sync with iCloud.

    Outlook not installedYou can use iCloud Mail, Contacts, Calendars, and Reminders in your web browser on iCloud.com.

TO TURN iCLOUD OFF COMPLETELY

Depending on whether you want to stop using iCloud on all or only some devices, do one or more of the following:

On your iOS deviceGo to Settings > iCloud, then at the bottom of the screen, tap Sign Out (Delete Account in iOS 7 and earlier).

Note:    If you sign out of iCloud (or delete your iCloud account), iCloud no longer backs up your iOS data. You can still back up your device in iTunes. For more information, open iTunes, then choose iTunes > Help.

On your MacChoose Apple menu > System Preferences, click iCloud, then click Sign Out.

On your Windows computerOpen iCloud for Windows, then click Sign out.

Note:    If you turned on automatic download of music, app, or book purchases (in iTunes preferences or in Settings on your iOS device), your iTunes purchases are still downloaded to your devices.
 
(Above information taken from APPLE SUPPORT)

OneDrive:

Windows 10 will put your documents, music, and photos automatically into its cloud service, if you don’t tell it not to.  Microsoft wants you to store your data in the company’s cloud-based storage service.   You have to change some settings to avoid this, as not only will it consume your data allowance it will also start to charge you when you use up your available space.

Turn off OneDrive for your documents, music, pictures and videos:

Right-click Documents in the Navigation pane (must be the Documents library, not any of the folders listed below it) and select Properties.

In the resulting dialog box, select the local location (probably C:\Users\yourname, where yourname is your login name) and click Set save location button.

1106-change-default-100622079-largeWhen you close the dialog box, your local Documents folder will be your default Documents folder. While both folders will be part of the library, new files will default to being saved locally.

Repeat and change the library settings for your Music, Pictures, and Videos libraries.

If you already have documents, music, pictures & videos stored in onedrive follow the steps here to store them locally on your computer rather than in a ‘cloud’ based program.

Information obtained from PC World 

Google Drive:

Google Drive for Mac/PC is the sync client. When you install Google Drive for Mac/PC, it creates a folder on your computer named Google Drive. Anything you put in this folder is synchronized with Google Drive on the web, and also becomes available on all your Google Drive devices. Google Drive provides bi-directional sync, so changes you make online are reflected on all your devices, and vice-versa. You can use Google Drive via your browser where it won’t automatically sync your files.

Turn off Google Drive Syncing

If you DO HAVE the Google Drive app downloaded to your computer or device, and you wish to keep your documents and photos from automatically syncing to the Drive folder on your computer, you can turn off syncing.

  1. On your desktop, click the Google Drive icon google drive desktop icon.
    • On a Mac, the icon is usually found in the menu bar at the top right of your desktop screen.
    • On a PC, the icon is usually found in the taskbar in the bottom right of your desktop screen.
  2. In the top right, click the overflow menu .
  3. Select Preferences.
  4. Uncheck the box next to “Only sync some folders to this computer.”
  5. Click Apply changes.

Change how much bandwidth Google Drive uses

You can increase or decrease the bandwidth used by Drive on your Mac or PC while syncing your files. Decreasing this bandwidth can allow more bandwidth for other programs on your computer.

  1. Click the Google Drive icon google drive desktop icon.
    • On a Mac, the icon is usually found in the menu bar at the top right of your desktop screen.
    • On a PC, the icon is usually found in the taskbar in the bottom right of your desktop screen.
  2. Click the overflow icon in the top right .
  3. Select Preferences.
  4. Go to the Advanced tab.
  5. To choose a different rate, click the radio button next to Limit to and use the up and down arrows to change the rate. The numbers are measured in kilobytes per second.
    • To use the full bandwidth for Drive, click the radio button next to Don’t limit.
  6. Click Apply.

Note: Changing the rate for downloads or uploads to a higher rate than your Internet connection allows may significantly slow other programs that you’re running using the Internet.

(Information Obtained from Google Support)

All efforts are taken to ensure BIRRR documents are correct at time of publishing, please contact your device manufacturer or cloud provider for further information.

Disable Automatic Updates (Mac Desktops & Laptops)

Mac has a handful of features that rely on a constant internet connection, these include the update feature.

OS X El Capitan, (10.11) the latest version of the Mac operating system is approximately a 6GB download.

Operating system software and all apps in the Mac App Store will automatically download and update themselves. However if you have metered internet or are living in a data drought you’ll probably want to stop these updates from downloading in the background.

Automatic app updates are controlled by the Mac App Store. To change the App Store’s settings, go to System Preferences > App Store. You can still enable checking for updates, by ticking the AUTOMATICALLY CHECK FOR UPDATES BOX, and leaving the other boxes blank.

Screen Shot 2015-10-18 at 10.22.11 am

This enables you to update when you have access to the appropriate data needed and allows the system to alert you to new updates available but does not download them without your permission.

NOTE: Install system data files and security updates is recommended to be checked.

When you are ready to install the updates go to System Preferences > App Store>Show Updates.

You can then decide on which updates are the most important and click on UPDATE or UPDATE ALL (if you have the required data available).

Important: If you’re going to use this automatic system update option, be sure that Time Machine backups of the Mac are allowed to be made on a regular schedule. Time Machine will do this automatically as long as it’s setup and the backup drive is available. If you do not make regular backups of your Mac, it is not recommended to use an automated system update installation feature.

Installing via a USB Memory Stick

How you handle Apple IOS updates is going to depend on which update it is.  To install onto a memory stick or external hard drive follow the instructions below.  You might be able to do this when you have access to free wifi or a friend / relative who has a larger data plan than yourself.

  • For major upgrades like 10.11 (e.g. El Capitan) your device will download an installer through the App Store
    • copy the installer file from the computer you downloaded it to, to an external drive
    • It’ll show up in the Applications folder when you download it and you can just move that or right-click and copy/paste it to your external drive
    • You can also use that method to create a bootable disk in case you ever need to reinstall OS X on your computers
  • For the minor updates they’ll be posted to the Apple website
    • you just need to download it from there to your external drive

Please note, while all care has been taken in compiling BIRRR documents, we recommend that you check with your system operator before implementing any changes.  Operating software can also be downloaded at any Apple Store, there may be a charge for this.

Tips shared by BIRRR taken from Apple Chat help, October 2015.  While all care is taken compiling these fact sheets, we advise you check with Apple Support if you have issues or concerns.

Footnote: All information compiled by Amanda Salisbury & Kristy Sparrow for  BIRRR and is current as at 18th October 2015.